Find a location with good light for a portrait shot. Place your subject some distance in front of a simple background and select a wide aperture together with a moderately long focal length such as 100mm on a 35mm full-frame camera (about 65mm on a cropped-frame camera). Take a viewpoint about one and a half metres from your subject, allowing you to compose a headshot comfortably within the frame. Focus on the eyes and take the shot.
Wide apertures create shallow depth of field, especially when combined with a long focal length and a close viewpoint. In human vision the eye registers out-of-focus areas as vague or indistinct – we can’t look directly at the blur. But in a photograph, areas of soft focus can form a large part of the image surface so they need to be handled with just as much care as the main subject.
Don’t forget that the camera’s viewfinder image is obtained at maximum aperture for maximum brightness and therefore at the shallowest depth of field. Use the depth of field preview button to see the actual depth of field at any particular aperture. It’s surprising to see the effect that a single f stop can have on the appearance of an image.
My shot
Canon EOS 450D 70-300mm ISO 100 133mm f/4.5 1/100 sec
Conclusion
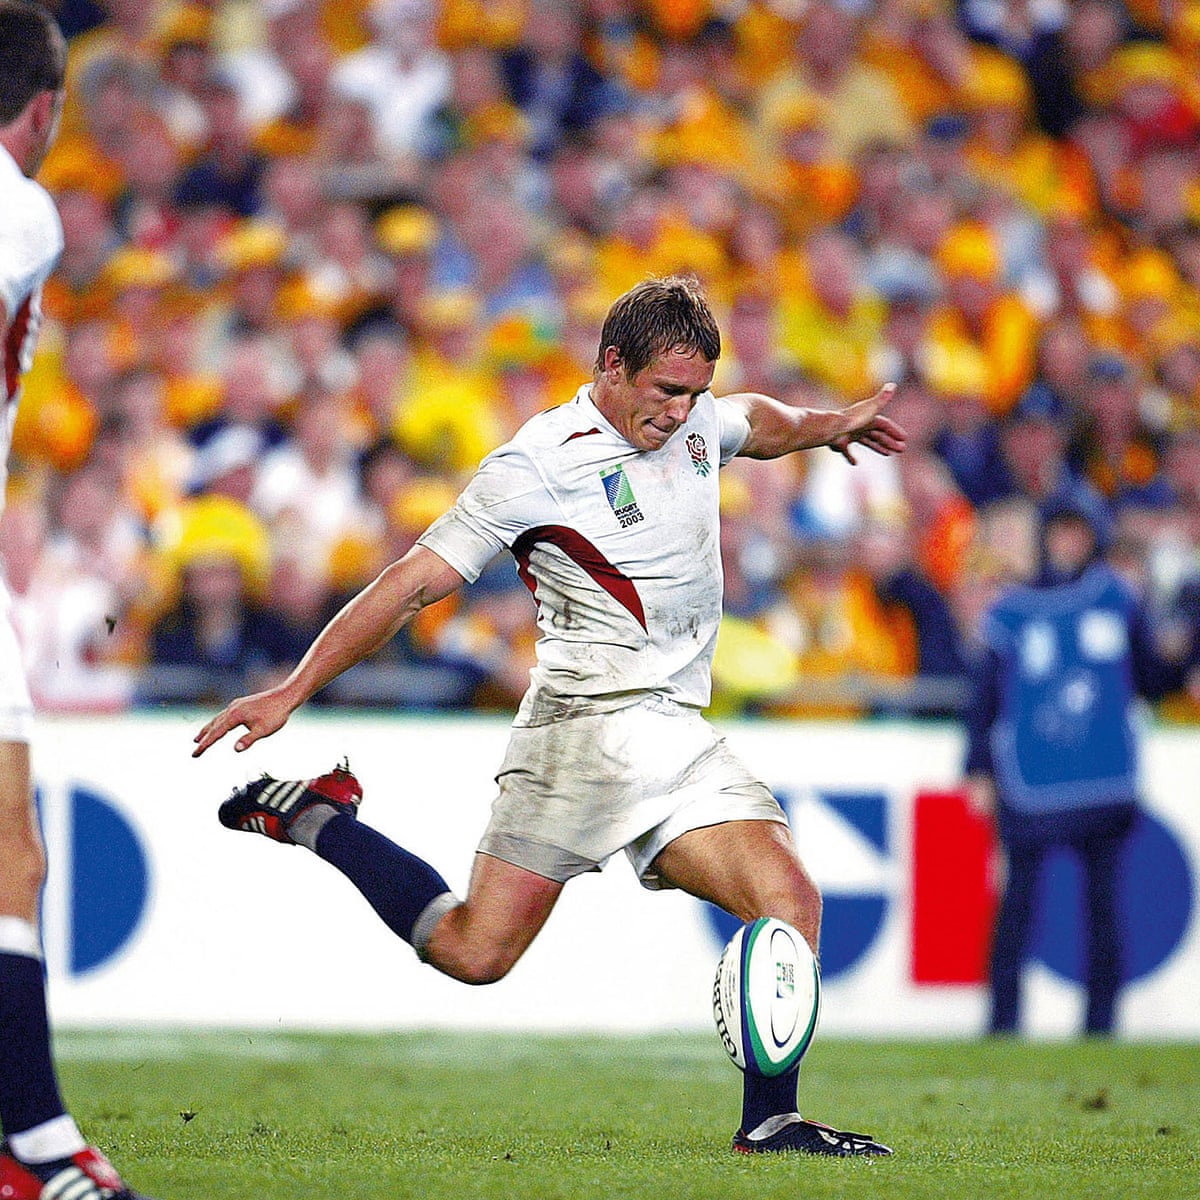
Focussing on the subject even closer, with the widest aperture the lens will allow, gives even more contrast between the subject and the background. The shallow depth of field makes the subject stand out more from the background. The lack of focus in the background makes the eye concentrate on the in-focus subject. This technique could have a wide variety of applications and is often used in media and sport to accentuate what is happening in the scene.
Does zooming in from a fixed viewpoint change the appearance of things? If you enlarge and compare individual elements within the first and last shots of the last exercise you can see that their ‘perspective geometry’ is exactly the same. To change the way things actually look, a change in focal length needs to be combined with a change in viewpoint.
Select your longest focal length and compose a portrait shot fairly tightly within the frame in front of a background with depth. Take one photograph. Then walk towards your subject while zooming out to your shortest focal length. Take care to frame the subject in precisely the same way in the viewfinder and take a second shot. Compare the two images and make notes in your learning log.
As you page between the two shots it can be shocking to see completely new elements crash into the background of the second shot while the subject appears to remain the same. This exercise clearly shows how focal length combined with viewpoint affects perspective distortion. Perspective distortion is actually a normal effect of viewing an object, for example where parallel train tracks appear to meet at the horizon. A ‘standard lens’ – traditionally a 50mm fixed focal length lens for a full-frame camera (about 33mm in a cropped-frame camera) – approximates the perspective distortion of human vision (not the angle of view, which is much wider). A standard lens is therefore the lens of choice for ‘straight’ photography, which aims to make an accurate record of the visual world.
My shots
Canon EOS 450D ISO 100 300mm f/5.6 1/100 secCanon EOS 450D ISO 100 70mm f/5.6 1/100 sec
Once I’d convinced my wife to take part, and the weather had finally turned into something that resembled spring, I took my camera and tripod into the garden and set up at the bottom of the drive. I positioned my subject at the other end of the drive in a suitable spot for the camera’s maximum focal length.
The first shot(with a grumpy subject) was cropped quite close by the lens and gave a fairly shallow depth of field.
The second shot, with the shortest focal length captured much more of the surroundings with a more ‘wide-angled’ view. It gives more of a sense of depth than the first shot as it is closer to the ‘standard lens’ length and therefore gives a truer view. Below are the highlighted areas of the photograph that can be seen with a shorter focal length.
Reflection
I hadn’t previously looked too closely at what effect the zoom had on a subject, its surroundings and the perception of the subject matter. This exercise has highlighted what a longer lens can do and what advantages and disadvantages it has. The focal length of my 70-300mm lens definitely exaggerated this.
‘ …there is no approach, approach suggests moving nearer, getting closer, suggests that we are not already near or close enough’
Stanley Cavell
Find a scene that has depth. From a fixed position, take a sequence of five or six shots at different focal lengths without changing your viewpoint. (You might like to use the specific focal lengths indicated on the lens barrel.) As you page through the shots on the preview screen it almost feels as though you’re moving through the scene. So the ability to change focal lengths has an obvious use: rather than physically move towards or away from your subject, the lens can do it for you. But zooming is also a move towards abstraction, which, as the word itself tells us, is the process of ‘drawing things away’ from their context.
Zooming also allows you to capture details at higher resolutions and this has been memorably explored in cinema. The film Blade Runner (Dir. Ridley Scott, 1982) provides a prescient vision of the future of photography from just before the dawn of the digital age.
The blade runner Deckard (played by Harrison Ford) treasures his old, silver-based family photographs but, like us, he uses a screen for viewing images at work. With his ‘Esper’ machine he can navigate around an image in virtual three dimensions by using voice commands. The resolution is incredible (think Google Earth) but at maximum resolution where you would expect to see pixels the image just dissolves into film grain.
In Michelangelo Antonioni’s film Blow Up (1966), David Hemmings plays a disaffected young photographer (based partly on David Bailey) who accidentally photographs a murder. Hoping to understand the situation that he’d unwittingly witnessed, he frantically ‘blows up’ the negatives to the limit of intelligibility, but the result is inconclusive. The frustratingly unresolved situation is a favourite motif of Antonioni as a comment on modern life.
‘Google Arts and Culture’ offer a digitally immersive exploration of cultural institutions around the world through a combination of very high-resolution images and Google’s own ‘Street View’ technology. While Holbein’s ‘The Ambassadors’ shot on a gigapixel camera is admittedly impressive, zooming in to it ultimately just resolves to craquelure and dust.
Taking inspiration from the examples above or from your own research, create a final image for your sequence. In EYV the important thing is to present your work in context, so make it clear in your notes what you’ve been looking at and reading. The focus here is on imagination and research skills rather than the technical aspects of zoom.
Zoom
Esper
Blade runner is an iconic film in the cinematic world and also one of my favourites. Having it used as research in this module has surprised me and I had to watch it again.
The Esper is a super computer used by the police in Blade Runner. It is briefly described in the official Blade Runner Souvenir Magazine, but a 1982 presskit for the film provides the most detail:
“A high-density computer with a very powerful three-dimensional resolution capacity and a cryogenic cooling system. The police cars and Deckard’s apartment contain small models which can be channeled into the large one at police headquarters. This big apparatus is a well-worn, retro-fitted part of the furniture. Among many functions, the Esper can analyze and enlarge photos, enabling investigators to search a room without being there. Bryant briefs Deckard with the help of an Esper and Deckard examines Leon’s photos with one as well.”
I had a vague recollection of seeing this film at some point but wasn’t too sure. I researched the film to refresh my memory and put it into the context of this exercise.
Don McCullin created the iconographic photographs that in the film are blown up by Thomas to discover something about the alleged crime. However, the blow-ups only offer ambivalent proof as they become more and more blurred and abstract by the continuous enlarging. Even photography that supposedly represents reality like no other form of media cannot help in shedding any light on the mysterious events in the park.
I took a look at the Google Arts and Culture site and the image taken of Holbein’s The Ambassadors and zoomed in as far as I could. I took a screenshot of the result depicting the craquelure.
All 3 of these references show the limitations of the zoom function in both fiction and factual. I also looked at the limitations of Google Earth /Maps which uses a combination satellite and aerial photography to form composite images that still have their limitations when it comes to zooming in.
For the final image, I took it into Photoshop and reduced its size and resolution as far as I could. This made the image unrecognisable due to the lack of detail. It did give what was left an unreal and somewhat etherial qualities.
However, taking inspiration from the film Blow up, I rendered a magnifying sphere in the centre of the image focusing on the detail.
This seemed a little surreal and reminded me of MC Escher’s Hand with Sphere.
Reflection
This exercise has helped me to understand how the same image can be framed differently using the cameras lens rather than moving the camera itself. However, it does have its limitations on quality and clarity of the final image.
The final exercise of this project makes use of the viewfinder grid display of a digital camera. This function projects a grid onto the viewfinder screen to help align vertical and horizontal lines, such as the horizon or the edge of a building, with the edge of the frame. Please check your camera manual (or Google search) for how to display the grid in your viewfinder. If your camera doesn’t have a grid display, just imagine a simple division of the viewfinder into four sections.
Take a good number of shots, composing each shot within a single section of the viewfinder grid. Don’t bother about the rest of the frame! Use any combination of grid section, subject and viewpoint you choose.
When you review the shots evaluate the whole frame not just the part you’ve composed. Looking at a frame calmly and without hurry may eventually reveal a visual coalescence, a ‘gestalt’.
Gestalt: an organised whole perceived as more than a sum of its parts. (Google Search using the define: operator)
Select six or eight images that you feel work both individually and as a set and present them as a single composite image. Add to your learning log together with technical information such as camera settings and two or three lines containing your thoughts and observations.
Gesalt
Images used
ISO 200 50mm f/2.8 1/100
ISO 200 50mm f/3.5 1/200
ISO 100 50mm f/3.5 1/160
ISO 200 50mm f/4.0 1/200
ISO 200 50mm f/2.8 1/100
ISO 200 50mm f/5.6 1/400
ISO 400 55mm f/10 1/200
ISO 100 50mm f/1.8 1/500
ISO 200 50mm f/2.5 1/100
Reflection
So this exercise helped me to understand how important it is not to stick in the rules, but to experiment, to try new positions for the subject, to put it in different parts of the frame, sometimes to imbalance the picture, to achieve certain result cohesive result.
For this exercise I just went out and photographed a number of trivial and maybe stupid things without thinking too much about the subject(harder than you think!!). The form of the objects was more important in the majority of the images and these seemed to be the stronger images than the more generic ones.
Keeping the images all monochrome helps form a relationship between the images and adds to the coherence of what individually seem like random images.
A point is the smallest graphical element, if you join many points together you make a line. In mathematics, a point doesn’t have any weight at all, it indicates a place. So compositionally, a point has to be small within the frame and its position is generally more important than its form (see the example of the white polystyrene cup underneath the chair below).
Take three or four photographs in which a single point is placed in different parts of the frame. When composing the shots use these three rules: the place of the point shouldn’t be too obvious (such as right in the middle), the composition should hold a tension and be balanced (the golden section or rule of thirds) and the point should be easy to see. Evaluate the shots according to these rules and select which one you think works best.
Then take a few more shots without any rules, just being aware of the relationship of the point to the frame. Without the rules, how can you evaluate the shots? That will be a key question throughout the whole degree programme.
Add the photographs to your learning log together with brief observations.
I struggled with finding a point initially. But, following feedback from my tutor in which he said to keep things simple, I chose an item that was out of place. Technically when you have small children nothing is out of place! I saw one of the boys’ balls on its own on the patio which seemed like an ideal point.
My tutor had also suggested using a fixed lens during these early parts of the course, so I used my ‘pancake’ lens for this one – a Canon EF 50mm f/1.4 and as I would be shooting outdoors I kept the ISO at 100 due to the bright conditions.
Of the 4 chosen images, the first 3 are all of roughly the same scale. Although the point is in different positions in the frame they don’t offer much of much variety of image. The fourth image is a bit more of an extreme positioning of the point and is vastly different from the other 3. All the images follow a grid setup in one form or another whether it be the rule of thirds or Fibonacci. These give the images balance even in their simplicity, even the fourth one!
I then tried to ignore the rules and placed the point wherever I wanted. This was quite hard as I am always looking out for compositional elements such as the rule of thirds and leading lines. Without rules the photos can look chaotic and uncomfortable. It’s a lot harder to break the rules than follow them.
I may have oversimplified this exercise with the image only having one item in it. However, this exercise did show me that the focal point does need to be considered in the image, but it doesn’t necessarily have to be central. It also illustrated to me that taking lots of images from lots of different perspectives and focal lengths can give more variety of imagery even if it is just a blue sponge ball.
Take three or four exposures of the same scene. Don’t change anything on the camera and keep the framing the same.
Preview the shots on the LCD screen. At first glance they look the same, but are they? Perhaps a leaf moved with the wind, the light changed subtly, or the framing changed almost imperceptibly to include one seemingly insignificant object and exclude another. Time flows, the moment of each frame is different, and, as the saying has it, ‘you can’t step into the same river twice’.
Now bring up the histogram on the preview screen. The histogram is a graphical representation of exposure – the camera’s sensitivity to light. As you page through the images you can see small variations in the histograms. Even though the pictures look the same, the histogram data shows that in a matter of seconds the world changes, and these subtle differences are recorded by the camera. If you refine the test conditions – shooting on a tripod to fix the framing, moving indoors and closing the curtains to exclude daylight – still the histogram changes. Probably some of the changes are within the camera mechanism itself; still, the camera is a sensitive enough instrument to record them.
Add the sequence to your learning log with the time info from your camera’s shooting data as your first images for Part One.
Image
I hadn’t really paid much attention to the histogram on the camera before, and due to its age my cameras on-screen histogram was a bit naff to say the least, it was so tiny.
I’d ventured into the garden for this one. I had picked a windy day that I hoped would help with this exercise in that it would give a bit of movement to the scene. I took a few shots with the boundary hedge and the Acer tree with the bird feeders on to try and catch the most movement, be it the wind or any flying visitors. I took the photos freehand and kept with the 18-55mm lens.
Due to the size of the histogram on the cameras screen I imported the photos into Lightroom and previewed the histogram there.
Even though the photos all looked alike, the histogram showed some subtle and some not-so-subtle variations in its output. Whether this was due to movements in the scene or the slight movements of the camera when holding and pressing the shutter button, it was interesting to see how the histogram changed for each shot.
After earlier dismissing the camera’s histogram, I did some more research around how to interpret what the histogram values meant. After a lot of searching and reading various articles on the internet I found a straight forward and simple ‘cheat sheet’ for interpreting the histogram.
I now have a basic insight into what the histogram tells you and how you can use it to improve the quality of your photos by addressing any exposure problems as well as using it when editing them later on.
Reflection
Having looked into the histogram, I now understand how it can help the photographer with image selection and composition. It has also highlighted the relevance of the Heractlitus quote ‘you can’t step into the same river twice’, in that this exercise has shown that to the naked eye all of the pictures may look the same, but in fact there are subtle differences meaning that you can’t shoot the exact same picture again due to changes in light or the movement of the clouds or trees.
I also think that the Alexander Shelley quote rings true to this exercise, or even the course. as understanding the technicalities of the camera and its uses will, without doubt, change and can only improve the way you approach photography going forward.
I think I will pay more attention to the histogram in future as it is a useful tool for examining the tonal values of the shots you take, both there and then or when editing later.
In this exercise you can use any images created elsewhere in the course, to print onto the paper samples you collected earlier.
You are encouraged to be experimental in these exercises; it doesn’t matter if you make a mess or get things wrong in the images you make. It is important to reinforce this message at this point in the creative process, as often people tighten up when they think they are embarking on the final piece, and lose some of the fluidity and spontaneity of their original ideas. We want to keep the visual outcome of this exercise fresh and not stultified by perceived conventions of what is ‘right’.
When you’re exploring visual ideas and processes, the outcomes may not always be what you thought they would be at the outset. You won’t always get it right the first time, and this is how it should be. By repeatedly trying out and experimenting with the materials and ideas at hand, you’ll discover new ways of working. Occasionally ‘mistakes’ turn into happy accidents and prompt a way of working, or technique, that you might choose to deliberately recreate and integrate into your next project. For example, one colour may bleed into another, or your coffee cup might leave a stain on your working paper. Instead of throwing these elements away, you could integrate them into your design process.
When you’ve created a set of images, scan or photograph these to create digital files – JPEGS or TIFFs on your computer. Make sure the resolution is set at 300dpi. Having gathered all the images together in one folder, consider how you’re going to print them. What order will the images appear in? At what size? How will the image appear on the page? Which paper will you use for which image? Do you have a particular image in mind for a particular piece of paper? Will you try printing the same image on different sheets of paper?
Draw a simple flatplan as a guide to working out how and where the image will be placed on the page, whether you will include any text, and to explore how the idea of ‘narrative’ might work. You might set up your page layout in DTP software, and work with your images digitally in this way, or you may simply print direct from your photo editing software onto the paper samples.
You may choose to use a desktop printer to output your images, or you may research other print methods such as screen-printing or etching. Print at least 16 pages using the images you’ve created on the paper samples you have collected.
Ideas
For this exercise I thought that the best images to use would be the ones from the ‘Tango with Cows’ exercise as this had produced some really nice imagery. But which ones to use? The only one that was immediately ruled out was the one with type already on it and was already made up of several layers of imagery.
As the exercise calls for 16 pages I thought that this could be divisible by the 4 ‘cow’ pictures from the exercise. I already had these saved on my computer as high resolution jpegs but I felt that this exercise would suit better if they were monochrome, so I desaturated them in Photoshop and upped the contrast.
These could now be printed onto any type of paper and have type or colour overlays as long as my inkjet printer could handle it!
I set my document in Illustrator with 16 art-boards of 1080px square. I then had a play around with my images and lated them over the flatplan to spread the image over all 16 art-boards, similar to an Instagram carousel.
Then, referring back to the exercise, I laid out the images over the flatplan at different scales and formed one large image that spilled over all the pages. I then, in keeping with the original poem, overlaid this with Soviet symbols and also some pages of the Communist Manifesto by Karl Marx.
I then tried printing some of the ‘pages’ on different types of papers that I had lying around. I had a couple of suitably sized pieces left from my G.F. Smith samples that would run through my printer and I had a role of brown paper for Christmas wrapping.
Colorplan Vermillion. The red, corrugated paper from G.F. Smith that I used to line my book in the exercise. Brown Kraft paper G.F. Smith Chromatico translucent paperG.F. Smith Heaven 42 pure white
Reflection on the papers
G.F. Smith Colorplan Vermillion Colonade
This paper went through the printer easily and absorbed the ink really well. It didn’t smudge when it came out of the printer and had a matt finish. Whether it was because of the absorbency of the paper, but image seems to be a little mottled and some of the paper showed through. Also, the paper being red, it didn’t show much in the way of the red areas of the image.
Brown Kraft Paper
I was worried about running the kraft paper through the printer as it had come from a roll and was holding its rolled-shape pretty well. However, it went though without a hitch. The paper absorbed the ink well with no smudging. I liked the effect it gave to the image, as the brown paper gave it the look of the everyday which led back to the origins of the poem. The red also showed better on this paper with a matt finish and good opacity.
G.F. Smith Chromatico
Cromatico Digital is a pure white translucent paper designed specifically for all HP Indigo digital presses and dry toner technologies. Each sheet incorporates a silver strip at each end that activates the photoelectric cells when the paper is fed onto press. I don’t have an HP Indigo digital press, but I gave it a go through the inkjet. It when through with no problems. This paper didn’t absorb the ink very well initially, it smudged when I removed it from the printer. Once the ink had dried the colours held well and had a slight sheen to them.
G.F. Smith Heaven 42
This paper is whiter than white. It feels so smooth to touch and very high end. It went through the printer without a hitch. The ink was still a little wet when it came out of the printer, but I was careful not to smudge it. The colour on this paper was a lot more vibrant than the other papers and had a glossy appearance.
Reflection
I was interesting how different papers reacted to being printed on. How it affected the colours and their opacity was interesting that the same ink and imagery can be affected by the type of paper and finish. Obviously this was only on an inkjet printer and not on a commercial press and result would differ depending on the printing process. This exercise has given me more of an insight into how the type of paper used can affect the end result. This will be useful when choosing the papers and finishes for my final assignment.
Begin by reflecting upon the sorts of projects, exercises and assignments you have enjoyed most:
Do you enjoy the creative freedom of working with your own text and images from scratch, or do you prefer working with text and images that are provided to you?
Do you prefer working in a ‘hands-on’ way, physically manipulating paper and materials, or do you prefer working digitally, laying out the pages and page elements on-screen? Which of the subjects covered in this unit have interested and engaged you?Below are some pointers of what has been covered in this unit, as a reminder. They are very broad areas, so as you’re reading through the list, reflect upon the more extensive content of each. Consider what aspects you enjoyed the most (and the least!) and make notes in your learning log.
Contextualisation: Researching designs and designers
Typography: Principles and experimentation
Colour: Colour management and working with images
Paper: Properties and qualities
Printing and bookbinding: Processes – traditional, digital
Try to identify a specific topic within one of these subject areas that you are interested in and can look into with more detail. You might know immediately and instinctively what you want to pursue. You may want to know more about traditional methods of bookbinding, for example, or hand-making paper. You may be interested in the mathematical principles underpinning the Golden Mean and Fibonacci series, and how these principles apply to page layout. You may want to design your own typeface. You may want to extend and adapt one of the projects and exercises you’ve already undertaken on the course. The focus of your interest may be quite specific. Identify it through this exercise by exploring each of your interests in turn and taking note of your resulting thoughts in your learning log.
Reflection
Looking back on previous parts of the unit I found that I am definitely more accustomed to to working digitally than physically. I struggled a lot with the parts of the unit that required producing something physical especially the altered book unit. I did enjoy the physical research into paper types as this gave me more of an insight into paper processes, the types of products available and print production.
Specific parts of the course I have enjoyed are:
Part 1: The Future Book. This was one of the early exercises that I liked. I played to my strengths in this exercise but produced the final design in a different way, which was well received by my tutor and my peers.
Part 2: Book Designers. This research-heavy exercise was quite daunting in the number of designers to research. However, I enjoyed learning more around the approaches that different designers have and how these influenced the final product.
Part 2: Designing a cover & Form and Function. These were probably up there as some of my favourite parts of the course. I thoroughly enjoyed the process of creating alternative covers for The Handmaid’s Tale and then taking this forward for Robinson Crusoe and producing different variants before deciding on the final design.
All of Part 3: As with my previous module, GDCC1, I feel drawn to the world of typography. This is where my strength lies and the part of design that interests me the most. I think the most difficult part of this part was designing the ‘bad’ typography book for the assignment, which went against everything I know about typography and this stifled my response a little.
Part 4: Concrete Poetry. It took a while to get my head around this exercise, but once I did I enjoyed myself. The exercise lent itself to typography and, as mentioned before, this was my strength. However, generating images for the second part of the exercise gave me the chance to play in Photoshop a little(I predominantly work in Illustrator) and create some fun and intriguing imagery.
The parts I didn’t like I have mentioned above. They were the ones that forced me to work in a more physical way, which I didn’t enjoy and I feel that these parts of the module I struggled with the most and found it hard to motivate myself to start them.
This module has helped me to build on my knowledge of layout and print design which I have already found very useful. It has made me think a lot more about colour management, page layout and print finishes which will hopefully go towards my final assignment. I now have a fascination with paper types and the processes they are used for and have amassed a large number of sample books!
Adrian Pipes’ On Press chapter, from his 2009 Production for Graphic Designers manual, provides a thorough overview of the print process, both historically and practically. Exploring paper, the raw materials that make it, recycled, handmade and manufactured paper, and other stocks; various qualities of inks; various printing processes, including emerging technologies; print finishing and binding; and interviews with a number of book designers.
Chapter Six – On Press (p.165 – 219) in Pipes, A. (2009) Production for Graphic Designers, 5th Edition, London: Laurence King Publishing, is available to you as a resource on the OCA student site.
“There is a long-standing misconception to to learn the craft part of any profession can be a chore. The temptation is to jump right in there and get on with the creative stuff. Print production, in particular, with its many different stages and processes, can seem dull… [however] Graphic designers are both artists and craftspeople… And when you have learnt all about print production, the creativity will be able to come shining through.”
Alan Pipes, Production for Graphic Designers (5th Edition), 2009. London: Laurence King Publishing. Page 11
Consider which aspects of the print process might feed into your creative decision making process. Where do the connections between artist and craftsperson sit within your work? Use your learning log to reflect on this.
Identify your nearest local printer. If possible, introduce yourself with the aim of arranging a short tour of their production process, from computer through to finished article. Seeing the printers at work helps to put the theory into context and can clarify certain parts of the process you may be unsure of. If the printer you find does print books then so much the better, but any medium-sized printers will no doubt print flyers, brochures and similar material. They will certainly have machines for reproduction, printing, folding and binding, which would be relevant to your research into printing books. Don’t be shy about getting in touch. When you explain you’re a student, printers often enjoy taking time out of their regular schedule to show people ‘round the works’ – but be aware that they do have busy schedules, so take advantage of any time they offer you! Take your camera and ask permission to photograph the machinery and production line, as an aide-memoire. Similarly, take your notebook and document the visit – you can incorporate this research later into your learning log.
Alternatively, you may want to concentrate on online options, such as PDFs or print on demand. Investigate these through internet research, documenting your key findings in your learning log.
Any visit may provide valuable research material for you, and of course the printer may prove a good contact for you in the future.
Print Process
These are the elements of the print process that I need to consider when designing my book for assignment 5.
Size and format of book (portrait, landscape or square): A4, A5, Square?
Colour printing or B&W: Full colour, limited palette, B&W
How the book is printed?: Probably be digitally online or at the printers due to it being a short run
How the book is bound?: Depends on the form of the book in the final assignment
Paper stock: Cover will be thicker than the block. Endpapers? Dust Jacket? Cloth Bound? Types of paper? Recycled? Gloss? Silk?
Finishing: Gloss, silk or uncoated? Foiling or spot colours/UV.
Production: Making sure all files etc. are ready and in the correct format.
Printers
Newton Print
My visit to Newton Print proved a great insight during GD Core Concepts and I took a lot from the visit with regards to preparing the artwork ready for print, and the best format for the printer to work from.
This time around I wasn’t able to visit them again due to COVID. I did manage to get on a few of their webinars and found the one below very useful and informative when it comes to their printing processes and what they offer and how they could help with the design/print process.
Newton Print also have some helpful guides on their website which are helpful in setting up your artwork…
How to add foiling to your design…
How to prepare your document for die-cutting…
I found these resources really useful and can see why Newton Print have such a good reputation.
Mixam.co.uk
Mixam is an online printing company that was recommended by a fellow student.
They offer a variety of print solutions and have a great system for uploading and editing your final design before it being checked by their in-house staff before being printed.
Mixam offer a lot of information on their website that sets out how your artwork needs to be prepared including CMYK imagery, pdf files for upload, how much bleed and how to embed elements into your design.
Mixam, like Newton Print, has lots of useful guides on adding special elements to your design(spot UV, foiling etc..) in all of the 3 main Adobe products. These guides aren’t as interactive as Newton’s but do contain a lot of detail:
I knew Newton Print were very good thanks to my previous visit and their reputation. However, I didn’t know too much about Mixam and was surprised at their offering and how much information and help they offered to make sure your product was produced with minimum fuss and error.
I am waiting for my copy of Alan Pipes, Production for Graphic Designers to arrive as I ordered it a few days before starting this exercise.
However you plan to work in the production of your book, spend some time now planning your workflow, using the notes above as a guide.
Think about how much flexibility you can allow yourself – don’t put yourself under too much pressure. At the same time, be aware of time constraints that may be outside your control. If you’re using a local printer, for example, make contact as soon as possible. Your printer may have a limited timeframe for doing your job and you’ll need to factor this into your workflow.
Scoping – 1-2 weeks
Contacting printers for costings and timescales is a major unknown for this assignment. Whether to use online or physical printers? Size and cost implications? Before or after Christmas?!
Research and content creation – 2 weeks
This will consist of online research as well as physical research, COVID restrictions allowing. There will be the need to select a subject matter, mind-map and create mood boards. This would then need to be streamlined into some semblance of order. Sourcing and creating imagery for my book and generating copy will need to be done and finalised.
Design – 2 weeks
This will involve deciding how the content will be displayed. This will be done by designing page layouts, covers and flat-plans and critiquing them to further hone the design. Other considerations will have to be decided on such as how the book is intended to be read(will it be a coffee-table read to thumb through or will it be held in hand for a long while?), what papers to use and what finishes it will have.
Pre-production – 2-3 days
Proofing and sure everything is correct. I’ll then prepare files for print, making sure that all images are 300dpi and CMYK and sufficient bleed is added. Make sure all files are backed-up and saved in the preferred format and quality that the printer prefers or recommends.
Printing – 1 week?
Liaising with the printer from the off is key to getting this stage right, whether that is online or in person. Can the printer do the binding on site or is that something else to consider? How will Christmas affect the timings? Can the printer provide the required finishes?
All this will need to be carefully considered as this is a complex process with some aspects that are out of my control which could cause problems with the timeline, Christmas being one and COVID the other. These could both impact on my ability to get my book printed. Physical printing may have to come later, perhaps just a digital copy submitted initially with printing to follow. However, the aspects of the process that are going to take up the most time are the research and design stages which will be needed to produce a good quality end result.
Image credit: BIS Publisher’s Wim Crouwel Alphabets written by Kees Broos with the forward by David Quay who also designed the book along with Rick Sellars.